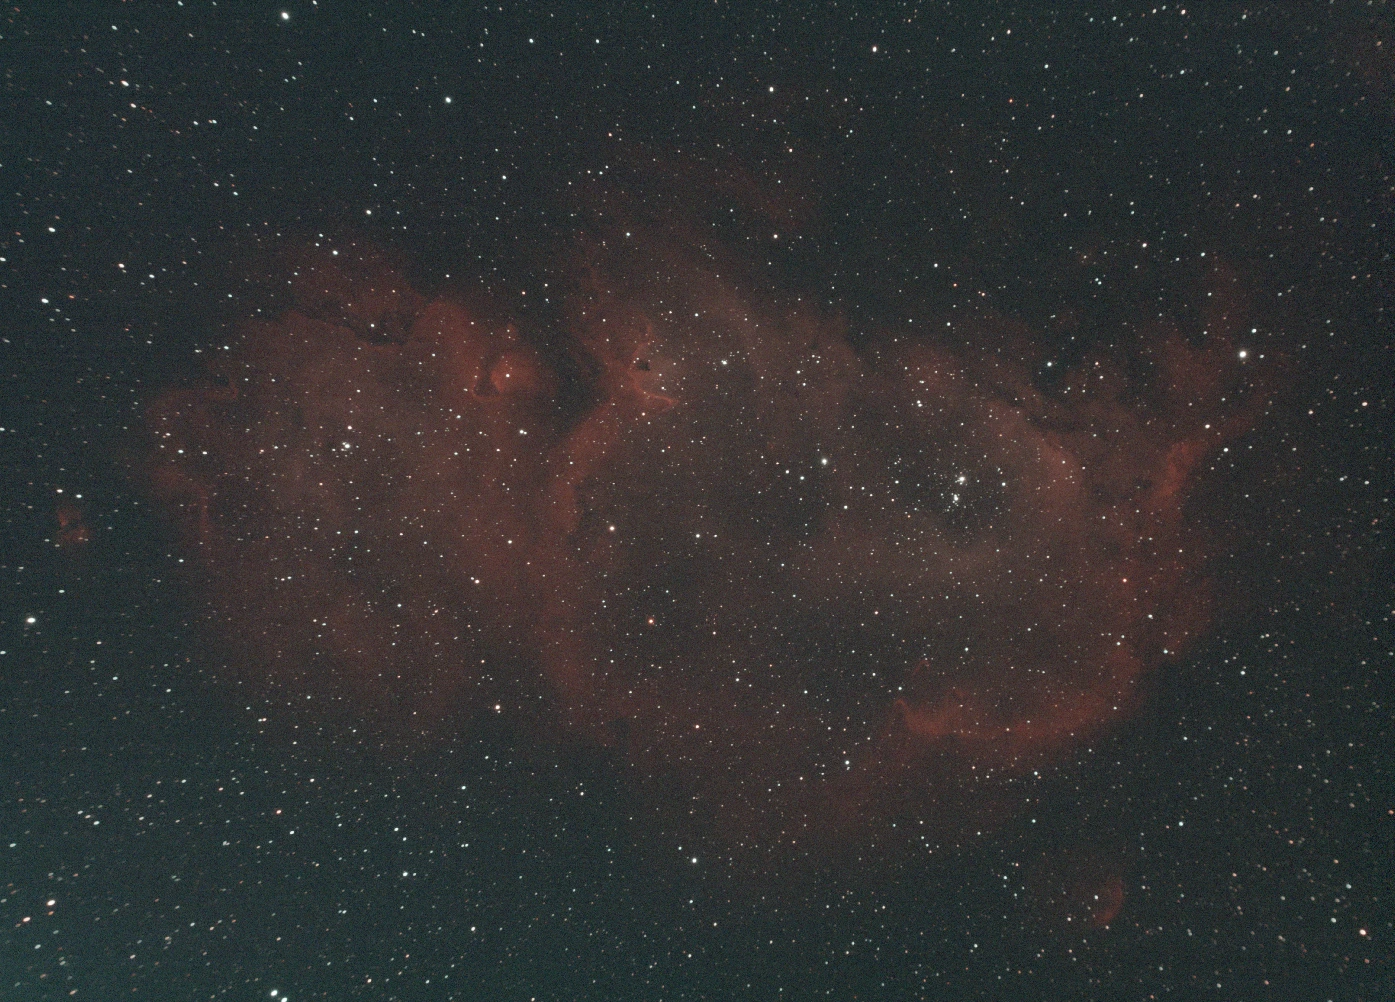
The Soul Nebula is an emission nebula in the constellation Cassiopeia. It is located 6,500 light years away from us and is about 100 light years across. The nebula has been used to test scientific theories such as triggered star formation and can be seen throughout the year from northern UK observing sites, along with the nearby Heart Nebula. With special imaging techniques, we can see a blue glow in the core due to the bombardment of Oxygen atoms by stellar radiation ripping electrons from them. Meanwhile the outer regions, where less of the radiation reaches, glow red due to the excitation of Hydrogen atoms.
A high resolution version is available here: https://telescopius.com/pictures/view/206217/deep_sky/ic-1848/ic1848-the-soul-nebula-hoo/by-exposingspace?revision_id=260305
Some additions to the imaging arsenal
The last few weeks have been less than ideal for astronomy in the UK. I missed the opportunity to image on a few clear nights in early October due to other commitments, and when I travelled to the Kielder dark sky reserve for an astronomy star camp, I was met with 100% cloud cover 100% of the time.
Despite the unfortunate weather, I really enjoyed the star camp and plan to attend again in future. After the event, I finally managed to invest in a dual-narrowband filter, which brought with it another week of clouds. But then finally, early this week on Sunday, Monday and Tuesday evenings, I was lucky to get some clear skies, and I finally put the new filter through its paces.
Dual-narrowband filters work by reflecting all light except light that falls in two narrow frequency bands centred around the Hydrogen alpha emission line and the Oxygen III emission line, which are the two main sources of light from emission nebulae. This means that even in a highly light polluted environment, it becomes possible to shoot these targets with long exposures of 5 minutes or more, while drastically reducing the impact of light pollution and even moonlight.
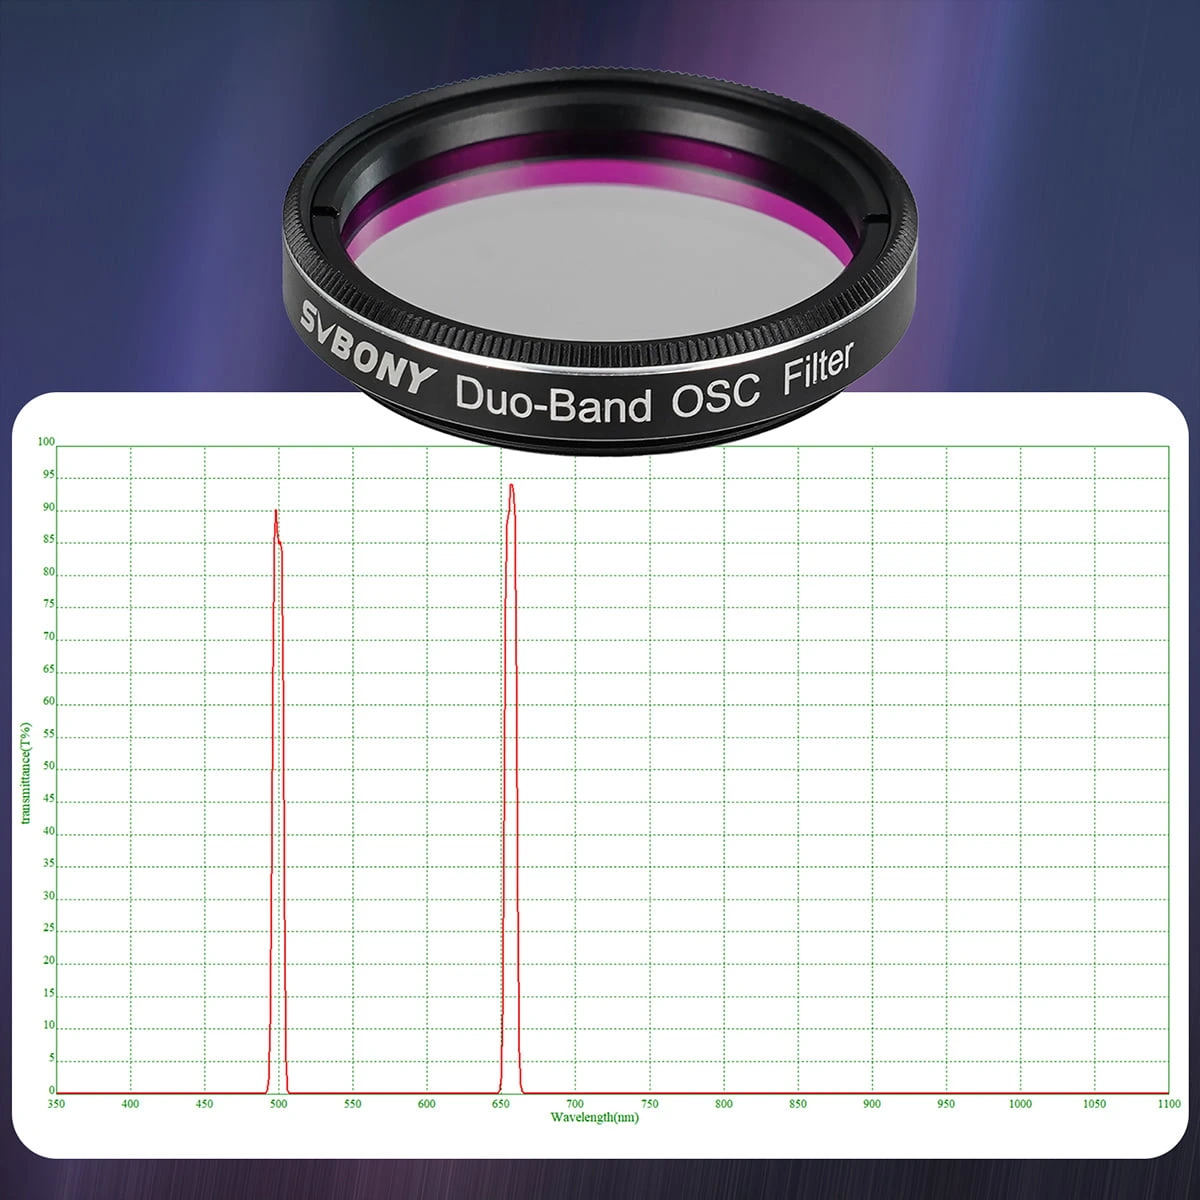
Typically, the narrower the bandpasses on the filter, the higher the quality of the filter. This particular filter has 7nm bandpasses, which is very good for its price although not quite at the level of some more premium filters which can achieve widths down to 3.5nm.
Another important addition for this project was the use of a cooled, dedicated astrocamera I borrowed from the university in order to help collect data for the undergraduate astronomy course. The astrocam is much more sensitive to Hydrogen alpha light emission than a standard DSLR which means I can collect data on emission nebulae much quicker.
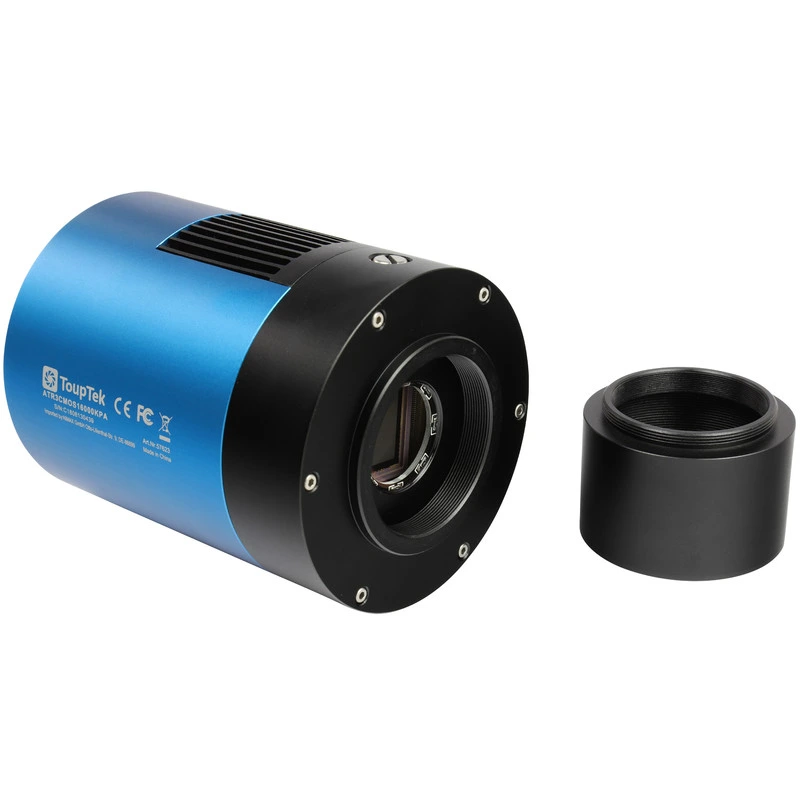
Instead of ISO, dedicated astrocams typically use gain and offset to boost the signal in low light conditions. The optimal gain is usually (but not always) unity gain, which means for every photon that is detected by the sensor, one electron will be produced. I used SharpCap to measure the sensor characteristics and determined that unity gain was at 501.
The offset is typically used to ensure no pixels in the sensor read zero at the end of the exposure. This is important, because otherwise you can end up with "clipped" pixels and dark patches which are difficult to deal with in processing. To determine the optimal offset, I simply took exposures at gain 501 with the minimum exposure time while varying the offset and read the minimum pixel value from the image statistics. I settled on an offset of 50 to be safe and make sure no pixels would end up clipped. You also don't want the offset to be too high, or you'll lose contrast in the final image.
The choice of target largely came down to which bright emission nebulae were visible from the observing site between 6pm and 11pm. The Soul Nebula seemed a solid choice as other nebulae dipped behind nearby buildings before 11pm, or would have required a meridian flip during imaging, which can take a lot of time to execute. The Soul Nebula is currently high in the sky, far away from the city's light dome (even though the filter does massively reduce the effect of light pollution, some will still get through if it falls within the bandpasses).
Since this filter only passes H-alpha and OIII, it presents a perfect opportunity for a HOO composition, which can result in really nice dynamic, contrasting colours in the final image.
Exposing the soul (bit dramatic, I know)
Because the filter is blocking a lot of light, it's important to shoot longer exposures to ensure the read noise in the sensor is overwhelmed. I decided to go for 5 minute exposures. Some would even use up to 10 minutes, but because aircraft frequently cross the sky, I didn't want to have to throw away any 10 minute exposures thanks to a crossing plane.
I cooled the sensor to -5 degrees Celsius to reduce thermal noise in the sensor. -10 would likely have been better, but since the camera is only on loan to me I was a bit worried about pushing it too hard, as its minimum operating temperature is stated as -10.
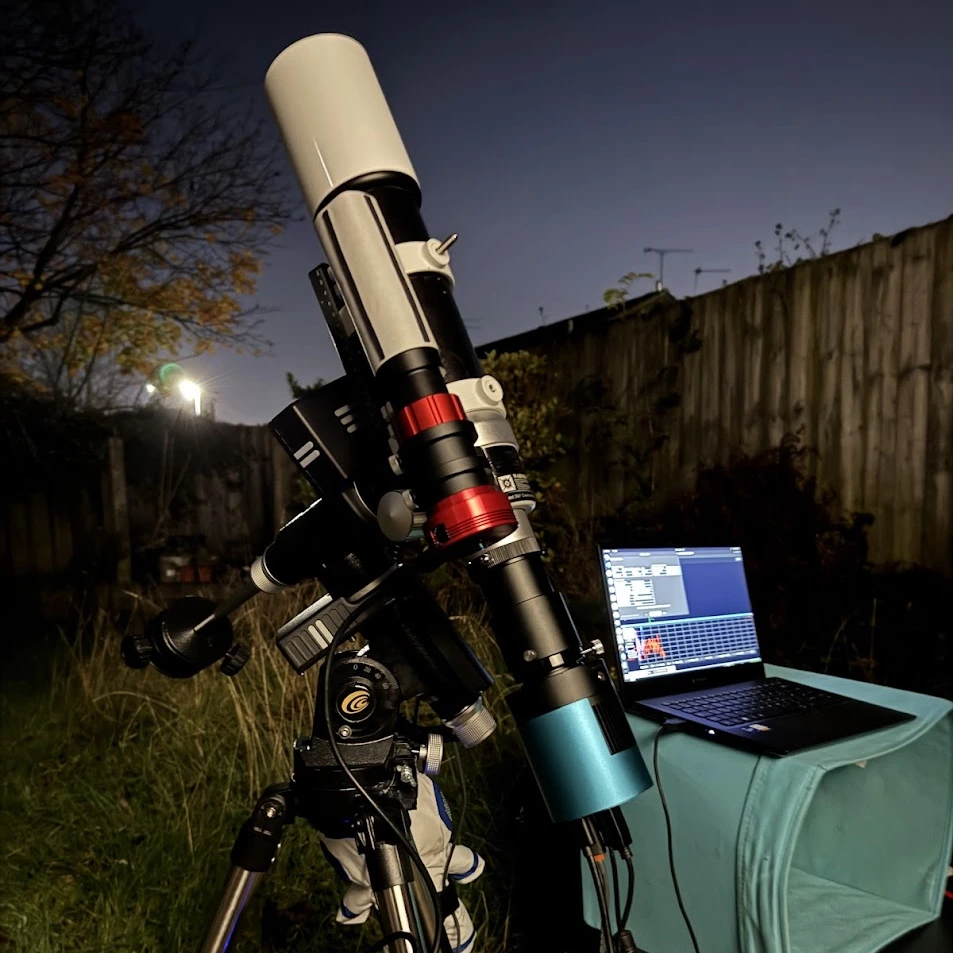
Once I was polar aligned and the guiding was calibrated, I started a sequence for 30 x 5 minute images and went inside to relax while it captured the images! Because each exposure was quite long, I dithered (shifted the pointing of the scope) by 10 pixels between each frame to prevent walking noise patterns.
The first night I managed to capture 2 hrs 45 minutes of exposure. Ideally there should have been another 30 minutes which I set to capture after the first 30 had completed, but something went wrong with the control software and it stopped capturing exposures early, so in the end I had 33 x 5 minute frames. I shot my flats using 8 sec exposures (much higher than usual due to the presence of the filter), and went to bed.
A huge benefit of a cooled astrocamera is that you can simply cool it to the temperature you shot at the night before and take your darks in the morning! So I hooked it back up, set it to shoot 20 x 5 minute dark frames and went on my morning run. Once I was back, I shot dark flats (bias frames are unadvisable for flat frames with longer exposures as thermal noise will start to become apparent) and then I had all the data I needed to start stacking.
I decided to hold off on doing a full processing attempt as, miraculously, I had two clear nights in a row forecast! So that night I rushed to get set up and was imaging by 6:30pm...
...and then despite the forecast, by 7:30pm it was completely cloudy. In the end I had 40 x 5 minute exposures, or 3 hrs and 20 minutes. I left the telescope outside for a bit but by 8:30pm I gave up on the sky clearing and brought everything inside. Of course by 9:30pm it was clear again, but I decided it was too late for me to go through the effort of setting everything up again and I wanted to get some sleep!
Processing in Hydrogen - Oxygen - Oxygen
The final calibrated stack shown earlier included weighting each sub-frame by the weighted full width half maximum (wFWHM). This is essentially a measure of both how sharp and how noisy each exposure is, so by using it as a weight for each frame in the stack, you can ensure the cleanest, sharpest frames contribute more to the final image. In all my images so far, I have found this to be the best way to stack.
As usual, I then ran GraXpert for background extraction and denoising and applied an automated pre-stretch to the image before removing the stars with starnet (this is important in particular for colour palettes like HOO, which can result in strange star colours).
To get the blue oxygen emission (which is a much weaker signal than the bright red hydrogen) to show in the final image, we need to be smart about how we combine the colour channels. Use of the dual narrowband filter will mean most of the red pixels in the sensor have picked up Hydrogen light, and the green and blue pixels have picked up Oxygen, but this isn't absolute as the Bayer filters over the sensor do not perfectly block all other colours.
To start, I create my Oxygen channel using the pixel math expression:
OIII = (2*Green + Blue) / 3
Next, to make sure I can get the Oxygen emission to show clearly, I subtract the OIII channel from the red channel while slightly boosting the signal of the red channel:
Ha = 1.5 * Red - OIII
Now, with my Ha and OIII channels, I can create a new 3-channel colour composite. I use Red - Cyan - Cyan channel filters, placing Ha -> R, OIII -> C,
OIII -> C, thus creating a HOO image. After some curves and saturation adjustments, the result is the following:
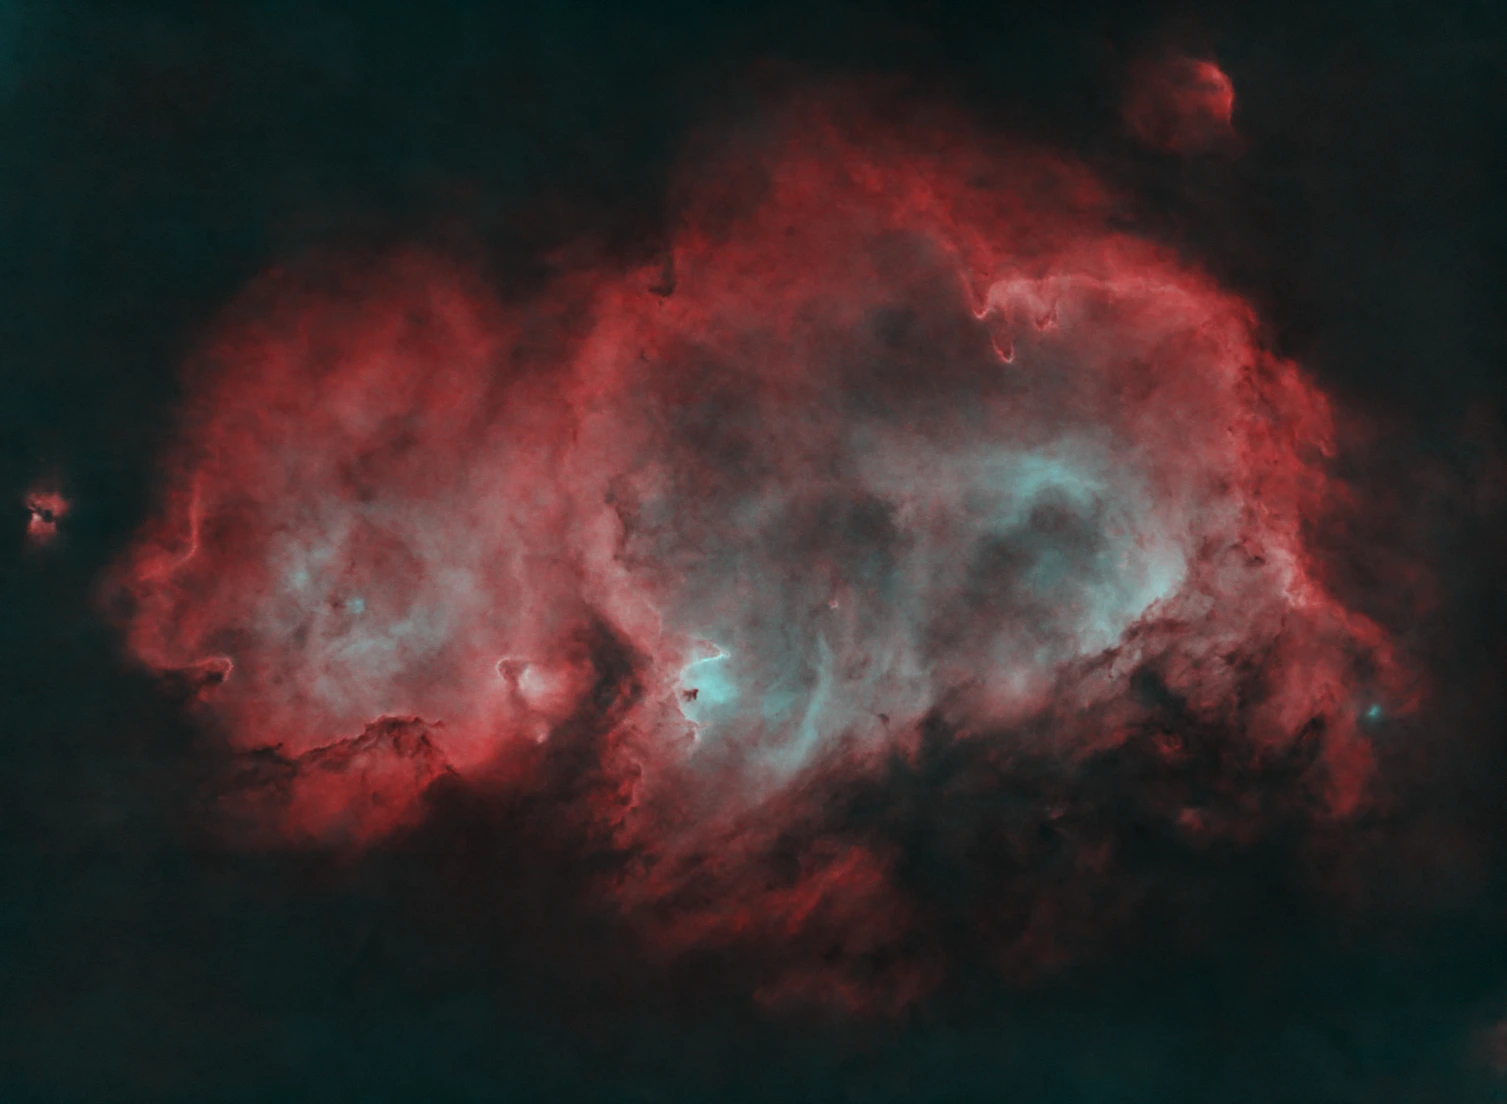
You can now clearly see the HOO emission at the core of the nebula. In fact, most HOO composites of emission nebulae will look very similar, with red Hydrogen outlines and blue Oxygen cores, but why?
Emission nebulae glow due to the radiation of stars inside them energising or knocking electrons off atoms. Hydrogen alpha emission is the result of an energised electron in the Hydrogen atom returning to its normal state and releasing that energy as red light in the process. Meanwhile, Oxygen III emission results when an Oxygen atom that has been doubly ionised (had two electrons knocked off it) collides with free electrons, energising its remaining ones. This is a much more energetic process, and thus releases light at a shorter wavelength towards the blue end of the visible spectrum. However, because it requires a lot of energy to knock two electrons off an Oxygen atom in the first place, this happens mostly towards the centre of nebulae, closest to the bright hot stars at their core!
The final step was to recombine the RGB stars I had separated out at the start. Technically, these stars are not true colour because they have only been imaged in H alpha and OIII, but they look a lot more natural than they would have had I left them in before compositing the nebula in HOO!
After recombining the stars, I made use of a final light touch of GraXpert denoise and ran the image through a great new tool by Seti Astro called Cosmic Clarity. This is a free alternative to BlurXterminator and does a very respectable job. From what I have seen, it works best on pre-stretched data, so I just did it as the final step in my processing. While it can't correct for aberrations like coma (yet?), it did a remarkable job of tightening up the stars in the image and bringing out some finer details in the nebula.
And with that I present my finished image of the Soul Nebula!
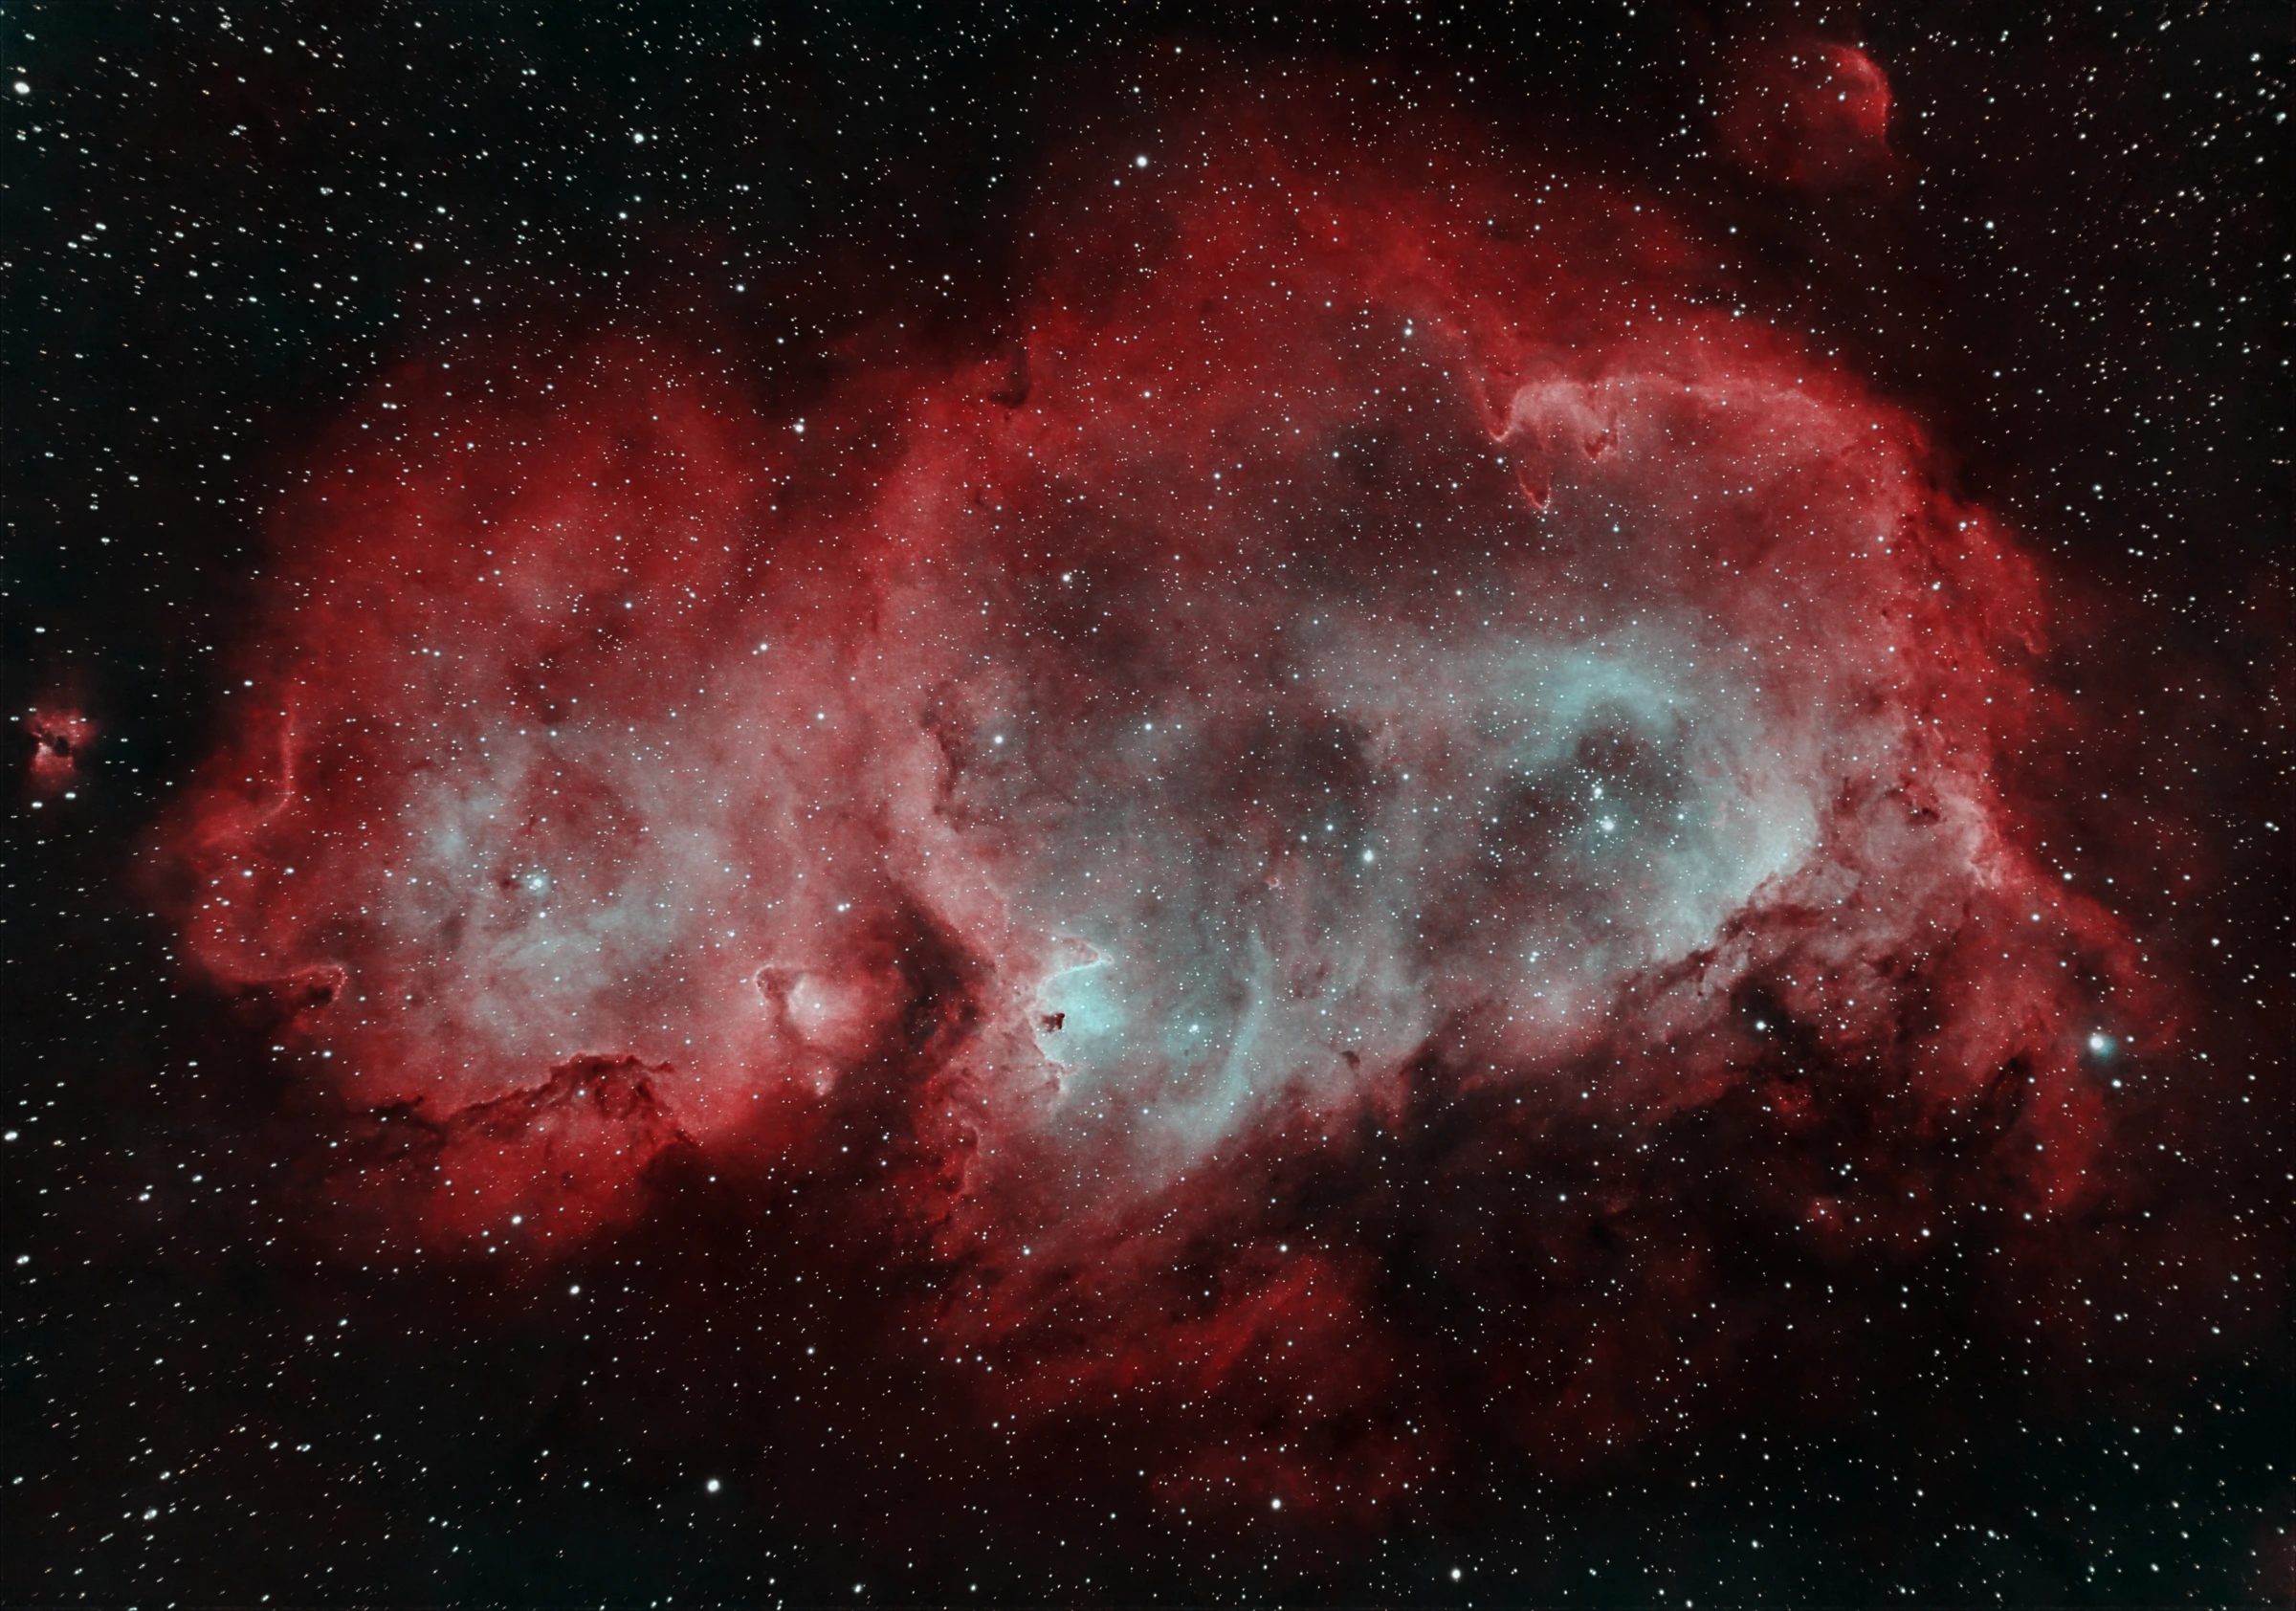
I really love the sense of depth the contrasting colours give to the nebula. The shape is actually the result of the strong radiation winds from the large, bright stars at the centre of the nebula. As it appears in the sky, you could roughly fit the moon in the centre of the nebula, except it's a whopping 159 billion times further away from us than the moon is, and roughly 270 billion times larger (hence why they appear about the same size in the sky).
The Soul Nebula (designated W5; IC1848 is actually the star cluster at its core but is commonly used to refer to the nebula) was used to test the triggered star formation theory, which suggests that specific events cause gas clouds in nebulae to compress, collapse, and eventually form stars. The scientists studying it saw that the age of the stars progressively decreased with distance from the centre of the nebula. This indicated that the pressure of the radiation winds carving out the nebula’s shape was compressing the outer layers and thus forming new stars.1
A summary of the capture details is given below.
Sub-frames
- 40 x 5 minute light frames at gain 501, offset 50, -5 degrees C
- 20 x 5 minute dark frames matched gain, offset and temp
- 30 x 8 sec flat frames, matched gain, offset, and temp
- 50 x 8 sec dark flats, matched gain, offset, and temp
Equipment
- Explore Scientific (ToupTek) ATR3CMOS16000KPA Colour cooled astrophotography camera (imaging)
- ZWO ASI120MM-S monochrome astrophotography camera (guiding)
- SkyWatcher EvoStar 72ED (primary scope)
- Svbony SV165 (guide scope)
- Explore Scientific iExos100-PMC8 equatorial mount
- Svbony SV220 dual-narrowband filter (Ha & OIII, 7nm)
- Laptop running KStars/Ekos & PHD2 for control